Android - Accounts and Access
To build the DevApp and develop a module, you need access to a small set of Q2-managed resources. Most are tied to your existing Q2 Developer Portal account — the only things you actively need to set up are a Personal Access Token and a sandbox environment URL.
What you need
| Item | What it is | Who provides it |
|---|---|---|
| Q2 Developer Portal account | Where you read documentation, open support tickets, and submit modules for review. | Sign up at q2developer.com (most teams already have one). |
| Q2 GitLab access | A user account on code.q2developer.com so you can clone the DevApp and read Q2's libraries. | Comes with your Q2 Developer Portal account. |
| A GitLab group for your organization | The folder under code.q2developer.com where your modules live. | Created by Q2 — request via support ticket if your organization does not yet have one. |
| Personal Access Token (PAT) | A token your local Gradle build uses to authenticate to Q2's private Maven repository. | You generate it from your GitLab profile. |
| Sandbox environment URL | The URL your DevApp points at when running locally (used as targetURLBase in settings.json). | Your Q2 representative. |
1. Q2 Developer Portal account
The Q2 Developer Portal is the entry point for module development — reading docs, opening support tickets, and submitting modules for publishing review. If you reached this page, you almost certainly have a portal account; new teammates can sign up at q2developer.com themselves.
From the portal you can:
- Open a support ticket — q2developer.com/support/create. Use this to request a GitLab group, ask questions, report bugs, or submit modules for review.
- View your existing tickets — q2developer.com/support.
See Submitting Tickets for guidance on what to include when filing a ticket.
2. Confirm GitLab access
Your portal account automatically grants access to Q2's GitLab at
code.q2developer.com. To confirm, sign in and load the DevApp repository:
code.q2developer.com/Q2Antilles/native/android/devapp-android.
If the page loads, you are set. If it returns "404 Not Found" or "Sign in", open a portal support ticket and our team will link your accounts.
Does your organization have a GitLab group?
Each organization gets its own group under code.q2developer.com — that is where
your module repositories live once you start publishing. If your organization is new
to Q2 and does not yet have one, open a support ticket at
q2developer.com/support/create with:
- Your organization name.
- The full names and work emails of the developers who need access.
- The name of the module(s) your team plans to build.
You can clone the DevApp and start development before the group exists — it is only required when you are ready to push your own module repository.
3. Generate a Personal Access Token
Gradle will fail to download Q2's libraries on the first build with a missing
msdk_repo_token error. The token is what authenticates your machine against Q2's
private Maven repository (group 782). A Personal Access Token (PAT) is the default
and needs no special GitLab role — you generate it from your own profile.
Steps to generate a token
- Go to https://code.q2developer.com.
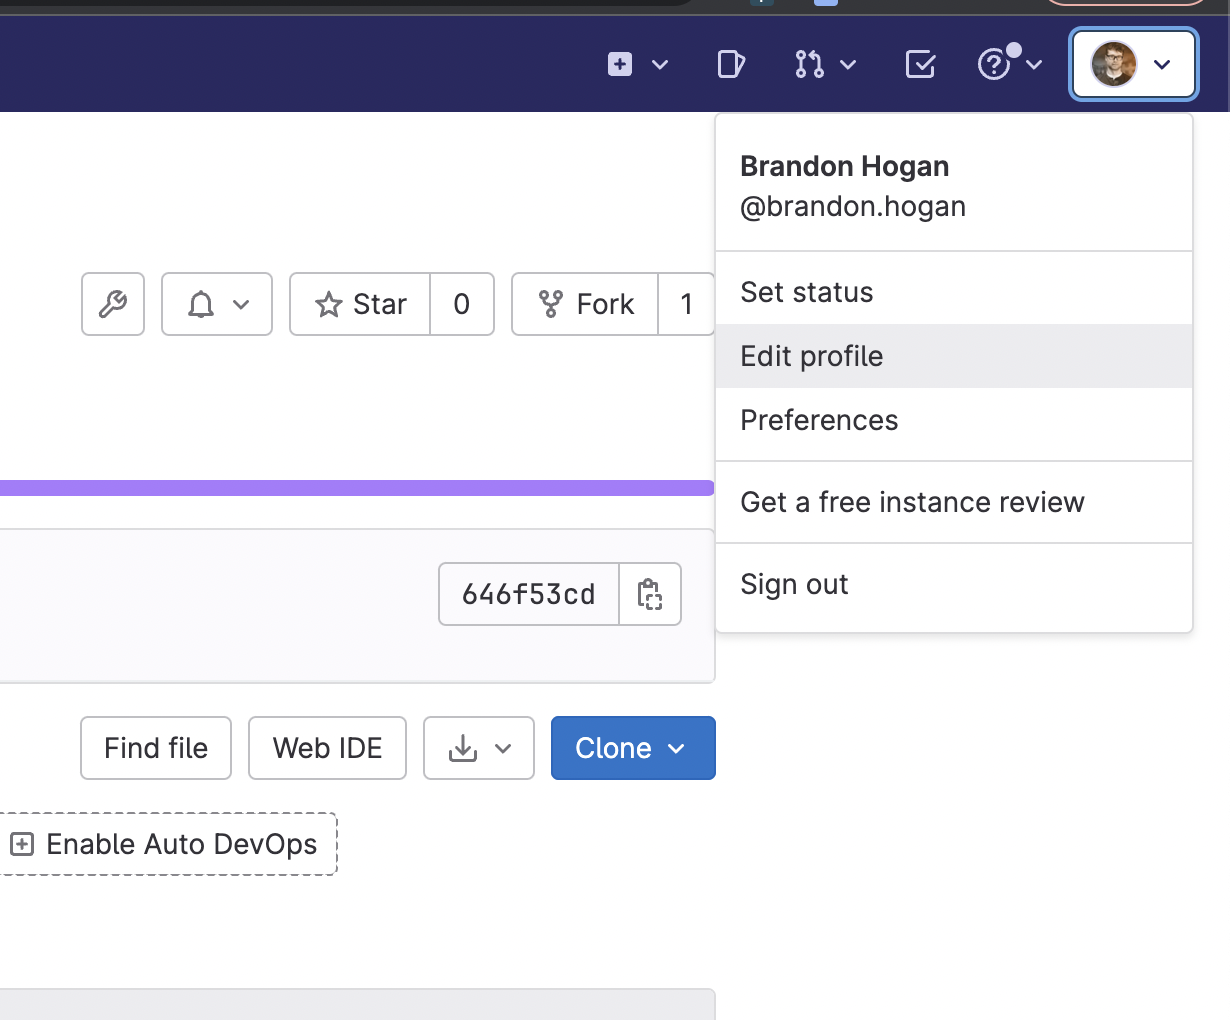
- Click your user icon (top-right) → Edit profile → Access Tokens.
- Click Add new token.
- Fill in the form:
- Token name: Anything descriptive — for example,
Android DevApp. - Expiration date: Pick a date inside your organization's policy. Tokens cannot have unlimited lifetime.
- Scopes: Enable
api,read_api,read_registry, andread_repository.
- Token name: Anything descriptive — for example,
- Click Create personal access token.
- Copy the token immediately. GitLab only shows it once — if you navigate away without copying, you must generate a new one.
If your team would rather authenticate with a GitLab deploy token than a personal credential, you can:
- If you have the Maintainer or Owner role on your repository, create one yourself
under Settings → Repository → Deploy tokens with the
read_package_registryscope. - If you do not (most partners have the Developer role, which cannot create deploy tokens), request one from your Q2 representative.
Then tell Gradle to send it through the deploy-token header by also setting
msdk_repo_token_header=Deploy-Token in ~/.gradle/gradle.properties — see
DevApp Setup.
Where the token goes
After cloning the DevApp, you add this token to your global Gradle properties file
(~/.gradle/gradle.properties) so local builds can authenticate against Q2's private
Maven repository — it lives outside the project and is never committed. You do not
edit settings.gradle; the CI pipeline supplies its own token there. Step-by-step
instructions are on the DevApp Setup
page.
Your token is a personal credential. Keep it in ~/.gradle/gradle.properties and out of
the repository, chat, screenshots, and public repositories. If a token is exposed outside
your organization, revoke it from Edit profile → Access Tokens in GitLab and generate
a new one.
4. Obtain your sandbox environment URL
Your DevApp's settings.json has a targetURLBase field that points at a Q2-hosted
backend environment. For most teams, this is a sandbox or SDX environment
your Q2 representative provides.
Example value (yours will differ):
https://stack.q2developer.com/sdk/native/<your-environment>
Without this URL, the DevApp runs but cannot communicate with a backend — login, account data, and most user-facing features will not work.
If you have not been given a URL by the time you reach the
settings.json setup step, request one from your Q2
representative or open a portal support ticket.
What's next
Token copied, sandbox URL in hand, and GitLab access confirmed? Move on to the Pre-Development Checklist to confirm everything is in place before you clone the DevApp.